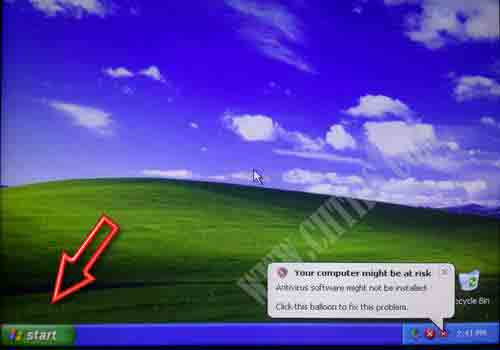
Windows XP Operating System has aged now the reason behind that is MICROSOFT has stopped updating, maintaining, and providing service related to all Windows XP-related issues.
So I suggest that if you are using this OS please upgrade to Windows 7, 8, or 10.
To install Windows XP using a USB pen drive you first have to create a bootable pen drive that contains all system files and executable files needed for Windows XP Installation.
Now to create a bootable USB pen drive you can use a number of free software which helps us to create or make a bootable or startup USB flash drive.
Below I have mentioned some of the popular free software::
- Novicorp Win To Flash
- Rufus
- Win To Bootic
- RmperpUSB
- And many more
System Requirements to install windows XP from USB pen drive ::
- Bootable Pen drive.
- Bios that support USB Boot.
- 400 MHz CPU or Equivalent.
- 128 Mb Ram.
- Hard disk More Than 10 GB (Windows XP Needs 5 GB Free Space Approx for Installation)
Also Read- What is Operating System and its Different Types
- How to Install Windows 8 From USB Pendrive
- How to Install Windows XP From USB Pendrive
- How to Install Windows 8 on Your Computer
- How to Install Windows 7 on Your Computer
- 5 Component of Operating System in Computer System
- Computer Basic Tutorials
How To Install Windows XP from USB Pen Drive- Flash Drive
Step 1:: Plug Your Pen Drive in One Of the USB Slots That are Present In the Computer Case | Cabinet …Your Pen Drive Must Be Bootable. Click Here to Make Bootable Pen drive
Step 2 :: Go to CMOS Setup / Bios Configuration By continuously pressing the DEL Key From the Keyboard Some common Keys are F1, F2, F10, F12
Tip:: Go To Your motherboard Manual And Find Which key to Hit to Go to CMOS | BIOS Setup …Sometimes It can be seen while the Computer starts at the Bottom of The Screen)
Step 3 :: Go To Advanced Setup And Press Enter…..
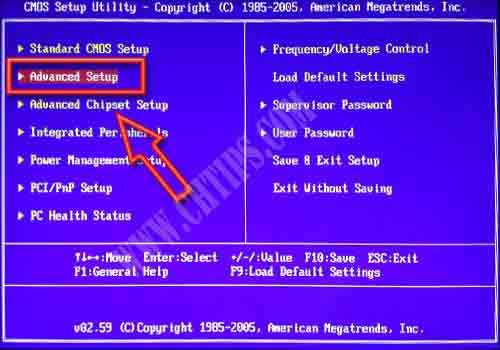
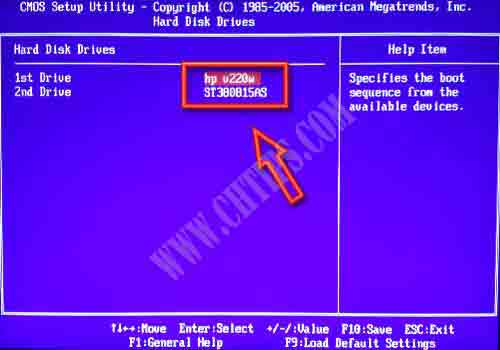
Step 4:: Select 1st Drive With Your USB flash drive Here In The Below Picture I Have Used HP pen drive.. You Can Choose Yours…And Select the 2nd Device As Hard Disk.
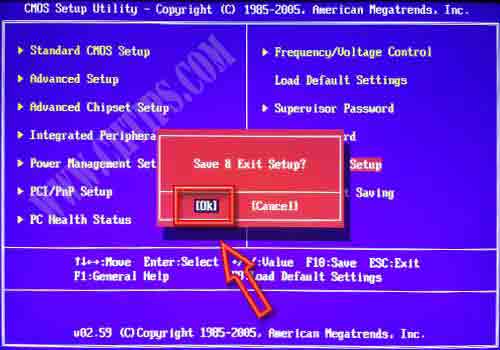
Step 5 :: Save The Changes Made In CMOS / BIOS …By Just Pressing F10 From Keyboard ….Your Computer Will Restart After You Press Y And Enter…. You can also change the setting by page up and page down key or + – keys from keyboard…
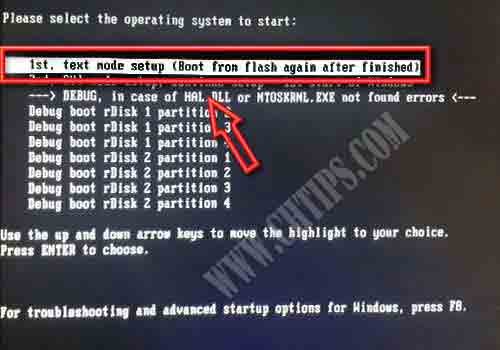
Step 6 :: Select 1st, Text mode Setup (Boot From Flash Again After finished) And Press Enter..
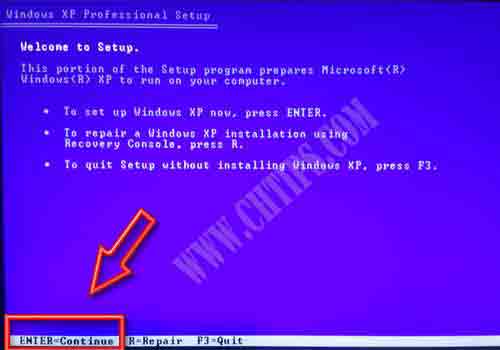
Step 7 :: Press Enter So That Setup Will Start the WINDOWS XP Installation Process
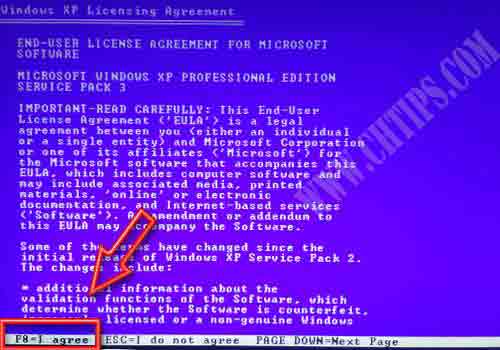
Step 8 :: Read The Windows License Agreement Carefully…Press F8 From the Keyboard If You accept all the Terms Conditions and Policies of Microsoft..
Step 9 :: In The Below Picture I am Using an 80 GB Hard disk While Installation W Is My Pen drive ….Un partition Space Is my hard disk
Press C to Create Partition of Your Choice
Also Read- What is a Computer Password
- How to Reset BIOS Password
- Different Types of Motherboard
- Install Windows 7 From USB Pendrive in Hindi
- What is a USB Pendrive
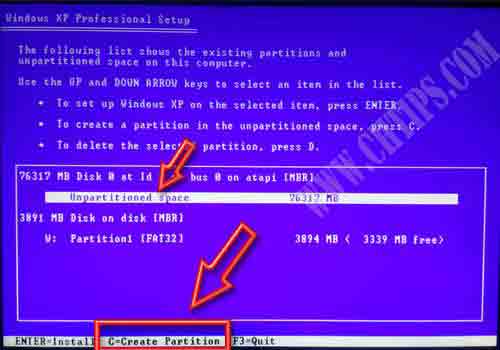
Step 10 :: After Creating Your Own Partition Select The Drive Where You Want To Install Windows XP…And Press Enter Key From Keyboard…
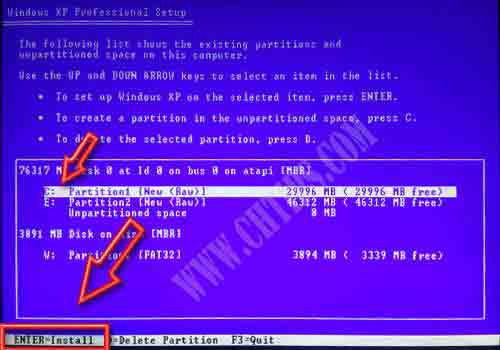
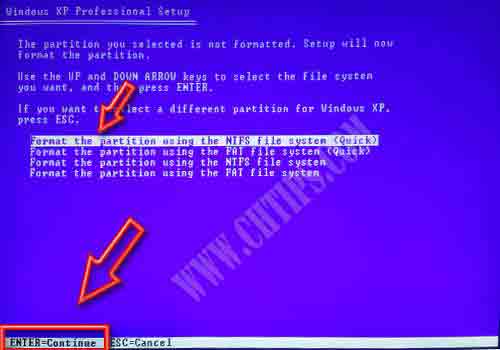
Step 11 :: In The Below Picture Setup is Prompting Us To Format Select :: Format The Partition using NTFS File System (Quick) You can Also Format Your Hard disk Without quick Format …I Strongly Recommend You To Format Hard disk Without Quick Format so that …It will check hard disk For any error’s Such as Bad sector.Damaged MBR Etc….
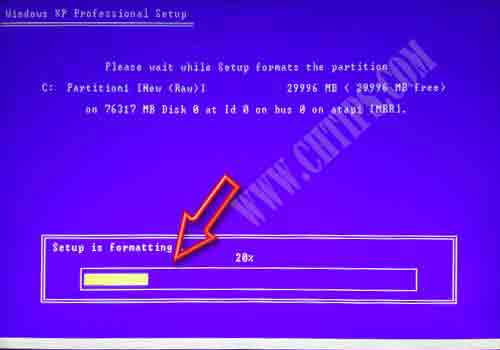
Step 12:: Windows XP Setup Is Formatting Your Partition …The Time Consumed While Formatting Your Drive Depends Upon, the size Of Hard disk You are using and The System configuration of your computer mainly depends upon the capacity of RAM, PROCESSOR, and MOTHERBOARD
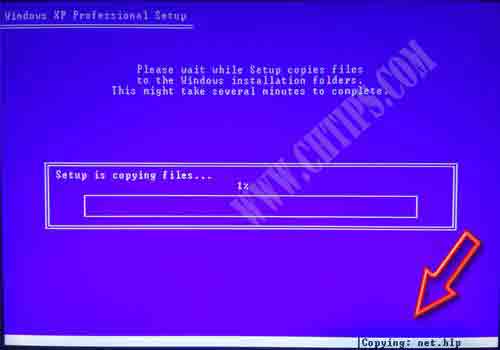
Step 13 :: Setup Is Copying Necessary Files Which Is Required For Installation.
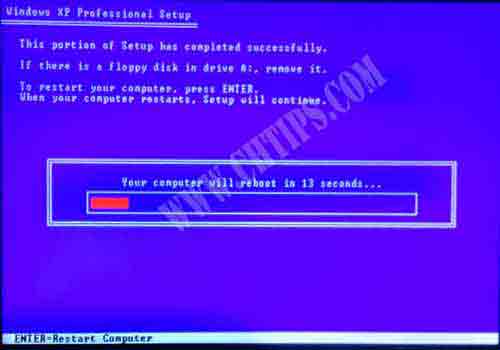
Step 14 :: After copying Files Setup Will Restart computer Automatically…
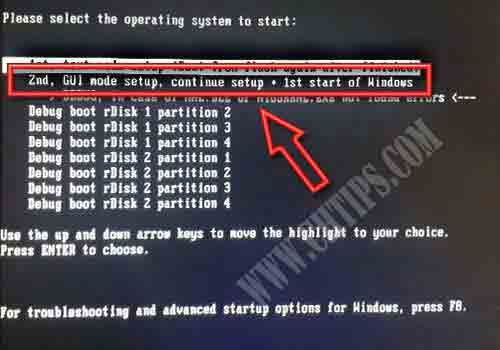
Step 15 :: Now Computer Will Restart ..Please Select 2nd, GUI Mode Setup, Continue Setup * 1st start of Windows
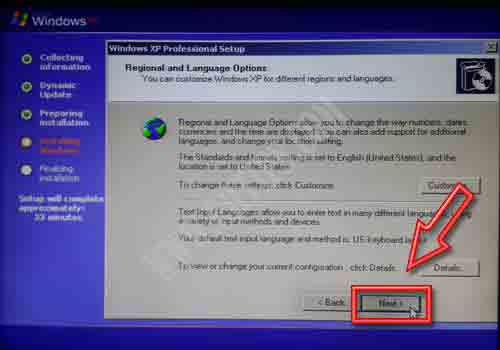
Step 16:: Now Select Your Regional Setting For Example.Country, Time zone,Location .etc
Also Read - What is Computer Fundamentals
- What is Computer Hardware and Software
- What is a Computer
- What is CPU in Computer
- What is a Computer Virus and its Different Types
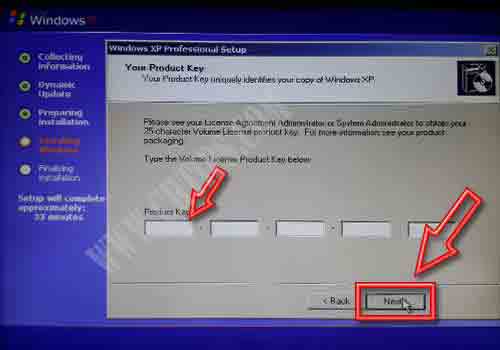
Step 17 :: Please Enter Product Of Windows XP Which Is Printed On CD.
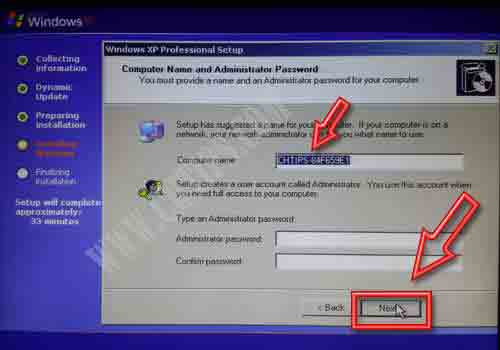
Step 18 :: Type Computer Name Of Your Choice …You can Also Give an Administrative Password For Security Reason..
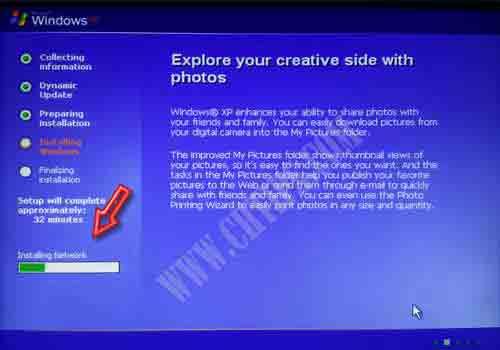
Step 19 :: Just wait Setup Is Installing Network..
Step 20 :: Congratulation you Have successfully Installed Windows XP Using USB Pen drive
